For many of us, the draw to the spring air gun lies in the challenge in getting it to shoot straight. Plainly put, they can be fussy and temperamental. But like any challenge, once mastered, will leave you feeling well accomplished. I proudly display my “springers” like trophies on a mantle… each one with a story unto its own. Representing an investment in time, analysis, and grey hair, I appreciate them all.
As a kid, I would spend countless hours trying to figure out why my RWS 34 would put one pellet where it was supposed to and another where it wasn’t. At that age, I was absolutely certain it was nothing I was doing wrong… after all by the 7th grade, I was already perfect. Though as it turns out, there was much more going on inside my springer than I was aware of and it’s these complexities that cause all of the misunderstanding surrounding spring air guns.
More often than not, accuracy issues in a spring air gun can be cured by mastering good technique and by having a basic understanding of why proper form is so crucial. When you pull the trigger on a powder burning gun, the bullet leaves the muzzle in an instant. This is not so with a spring air gun like the Ruger Air Hawk. In a springer, several fractions of a second will elapse between the time when you squeeze the trigger and the instant at which the pellet finally leaves the muzzle. If you move during these few critical milliseconds, so will the impact point of your pellet. The below photograph shows the mechanical components that make up the Air Hawk I used for this article.

When you cock the rifle, the pictured spring compresses and brings the piston (5″ cylindrical tube above the spring) with it towards the rear of the gun. When you squeeze the trigger, this whole mass of metal is released and goes lurching forward until slams into the breach of the gun… all before the pellet even leaves the barrel. It is this internal movement of parts & collisions during the shot cycle that so often throws the gun off target before the pellet is air born. The good news is that all this internal chaos can be partially tamed with what is called “follow through.” To follow through effectively, it becomes very important to hold the gun on target… even after you believe it has fired. By simply practicing the technique of keeping your sights on target long enough for the pellet to actually leave the gun, you will dramatically increase accuracy.
However, there is more to shooting a springer straight than perfecting follow through. If you want to be consistent from shot to shot and make pretty little groupings, you must also learn how to properly hold a spring air gun. The object of this technique, known as the Artillery Hold, is to support the gun as gently as possible along the four points that contact your body. The spring air gun is not to be shouldered tightly like a shotgun or high-powered rifle. If you try, your accuracy will suffer and none of your shots will land in the same place twice. To obtain consistency from shot to shot, allow the gun to float between your shoulder, cheek, and two hands. Be conscious of your trigger pull… don’t increase grip pressure as you squeeze the trigger and be aware of your cheek against the stock, keeping the contact point minimal and light. Finally, never close your fingers on the forearm. Leave your hand open and allow the gun to balance naturally in the hand. It should look something like this…
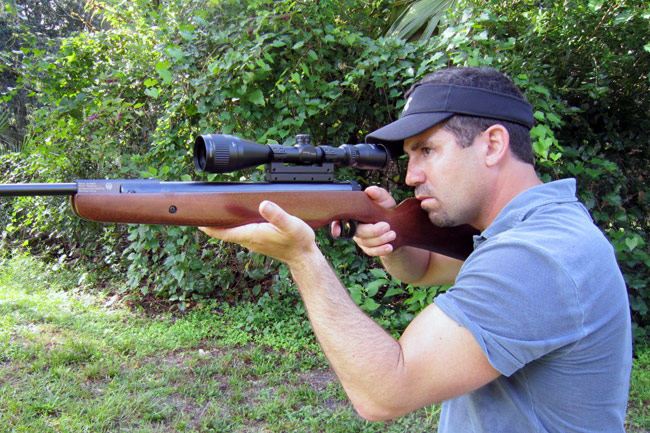
Take notice of the open palm under the forearm and the light grasp on the grip. If I let go of the gun with my right hand, the rifle would balance on the left. Also notice that my right thumb is not wrapped around the grip but rather gently lying above it.
The Air Hawk is pulled gently to the shoulder and my cheek is lightly touching the stock. Both eyes are open and focused down range. Before I squeeze the trigger I will inhale then exhale, being sure to pull the trigger straight back with the pad of my finger… not the crook. Your consistency from shot to shot will be dependent upon how well you can duplicate your hold and trigger squeeze. Any variation in your technique may have your pellet impacting the target in a different spot than the previous.
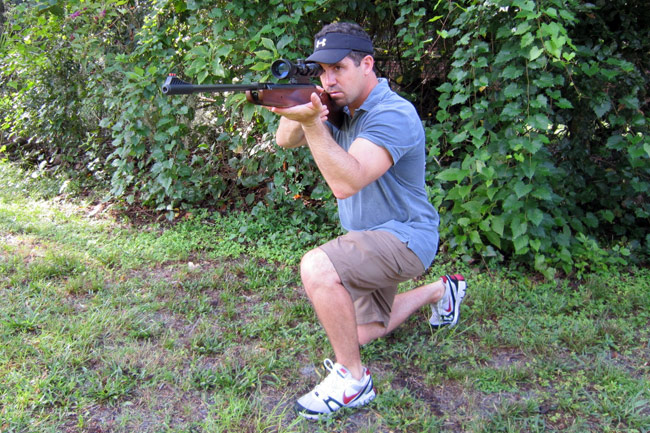
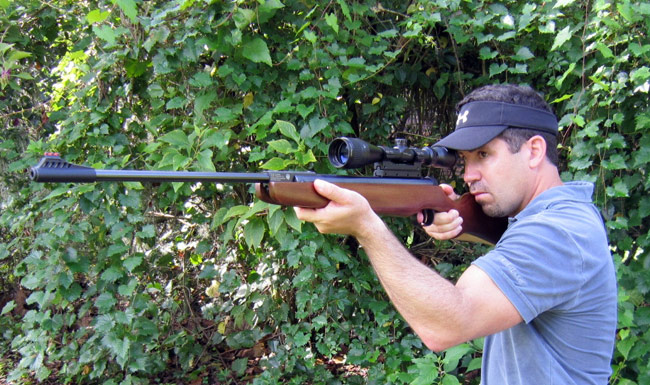
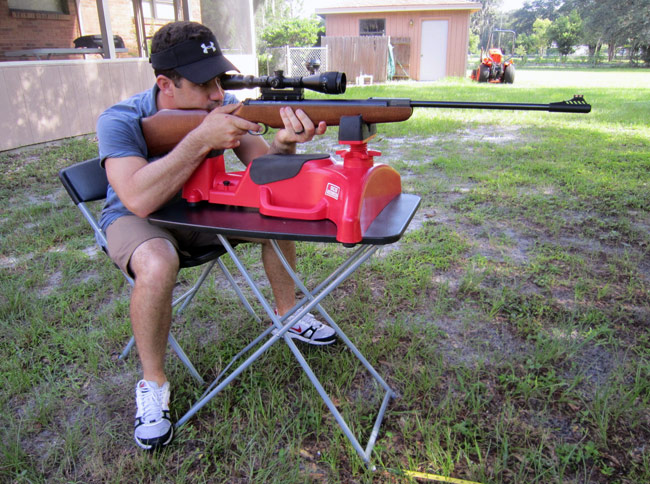
Common mistakes in form that may cause you to think you have defective merchandise will look similar to the photograph below. Wrapping the fingers around the forearm, clenching the riffle fore or aft of its balance point, or pulling it snugly to your chest & cheek are common no-no’s. If you have been shooting this way and not getting the results you want, the good news is that your springer has untapped potential.
Also contributing to accuracy is what is commonly referred to as “finding the right pellet.” It’s widely known among air gun enthusiasts that each and every gun will favor a different type of pellet. Even across the same model of air gun, your particular barrel may show a preference towards just one or two styles of pellet. Once you figure out which those are, your groups will shrink even more. This phenomenon can be so pronounced that one type of pellet will shoot 3″ groups at a mere 30′ to target and another will shoot 1/4″ groups at the same distance with the same gun. The reasoning is best discussed another day but the point to take away is this… just because your gun is shooting poorly with a quality pellet doesn’t mean there’s something wrong with it. Start experimenting with various pellets and it’s likely you’ll soon find one that works well.
If you’re concerned with your springer’s capabilities and you want to eliminate some of the shooter error, your springer can be successfully tested from the bench. When exploring solely the gun’s proficiencies, there are also some techniques to be mindful of when shooting from a bench. As in free form, you cannot shoot a springer from the bench as you would a traditional powder burner. For the most part, the practice is similar to the above mentioned Artillery Hold… but you won’t actually be holding the gun. The bag will be doing this for you. Done correctly, it would look something like this…
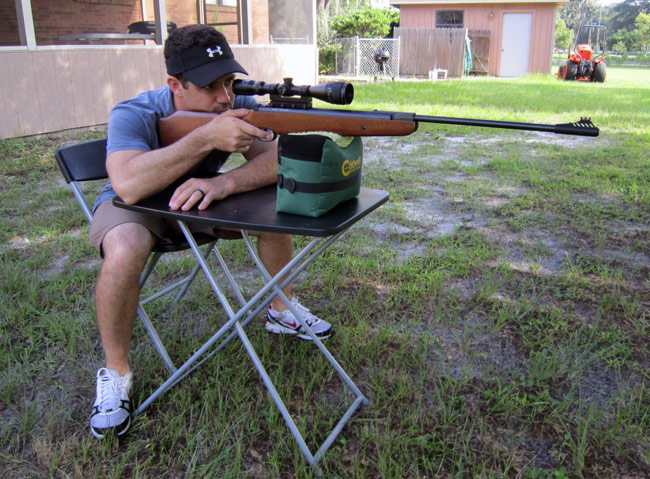
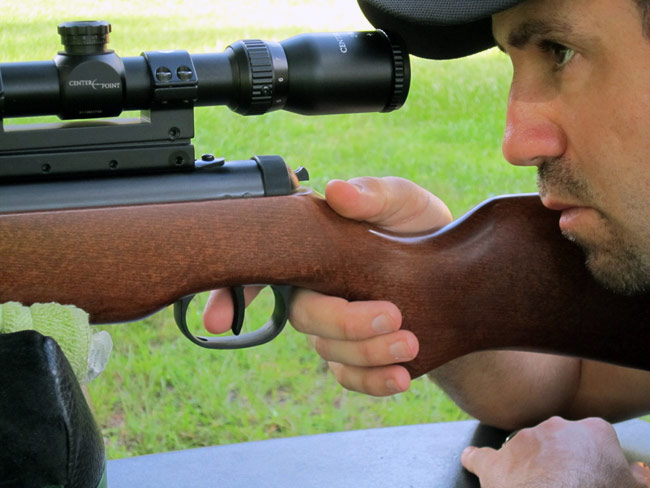
The same light holds will apply. The trigger is to be pulled straight back and follow through is held for a brief second after the gun has fired. I know I have done everything correctly when groups look like these…
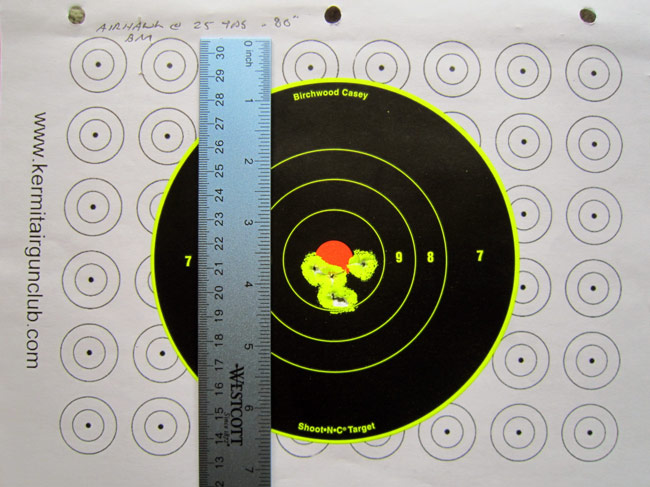
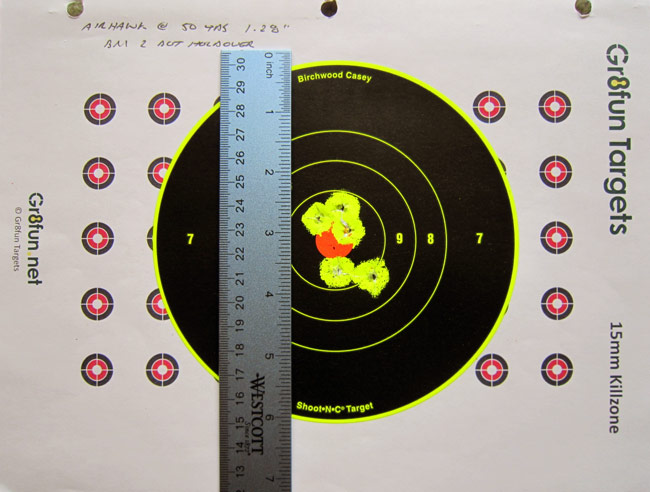
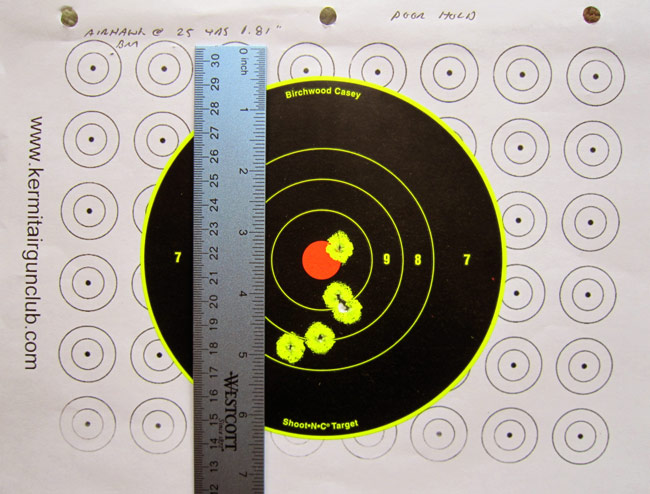
To substantiate this article’s content, I experimented by intentionally grasping and shouldering the Air Hawk like I would a high power, center fire rifle. I also placed it on a traditional hard rifle rest to keep things perfectly steady. What happened to the group at a mere 25 yards to target was typical of a poor hold. Almost as if on cue, the point of impact not only dropped down and to the left but the group opened up by over 220%. As you can see, when the rifle isn’t permitted to recoil freely, the barrel winds up in a different place each time the pellet is released. The result is a rifle that seems broken, when in fact it’s a great shooter. The below photographs depict what not to do and the results you may get if you rest a springer improperly…
If you make the decision to own a spring air gun, be patient with it and practice, practice, practice. Once mastered, it will provide you with years of reliable and accurate shooting. If at first you’re not happy with the results, invest the time to hone your technique and experiment with various pellets. It’s likely that in the end, you’ll be rewarded with a nice shooter that you can be proud of for a long time to come.
